This integration uses OnPage’s Incoming Webhooks. This is a common integration path with OnPage and many other services will support this method as well. To get started, you have to access OnPage’s Webhook Console and register a Client ID and Secret Key. These are then used to authenticate the requests being sent to OnPage. Please keep these values secure as if they were a password. Although they do not allow Read access to OnPage, anyone with these keys can create Pages within your environment.
Navigate to https://integrations.onpage.com/#/integration/web-hook and login with your nps.onpage.com credentials.
Here you will see all of your currently configured Webhooks and the ability to suspend or remove them.
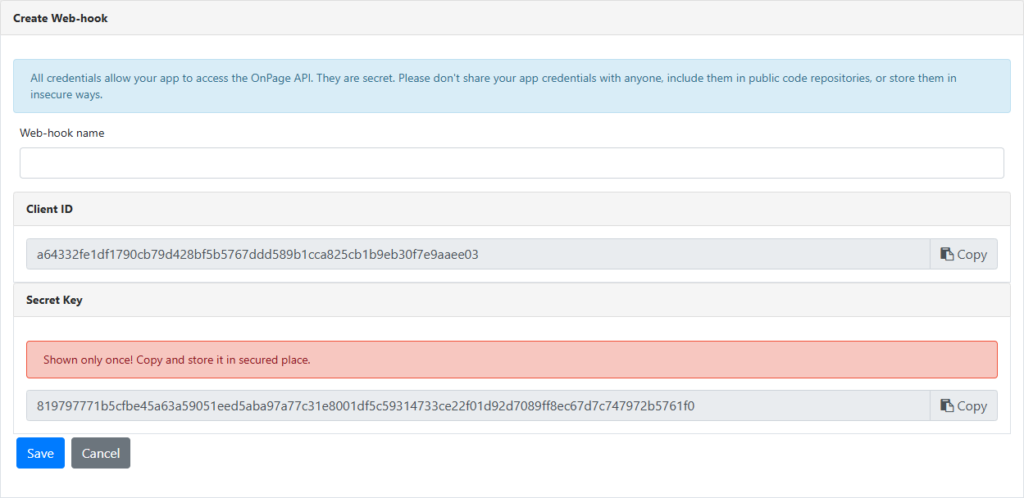
Click on the Create Button

Give a Webhook name (i.e., New Relic ONE integration)
Copy the Secret Key and Client ID and store it in a secure place. The Secret Key is only shown once.
Creating a New UpTimeRobot Alert Contact

Login to UpTimeRobot, open My Settings and create new Alert Contact. Now that we have the required pieces to set up the integration, we’re going to set up a new alert endpoint in Logz.io.
Choose Web-hook type for Alert Contact.
Fill the fields as shown in the image: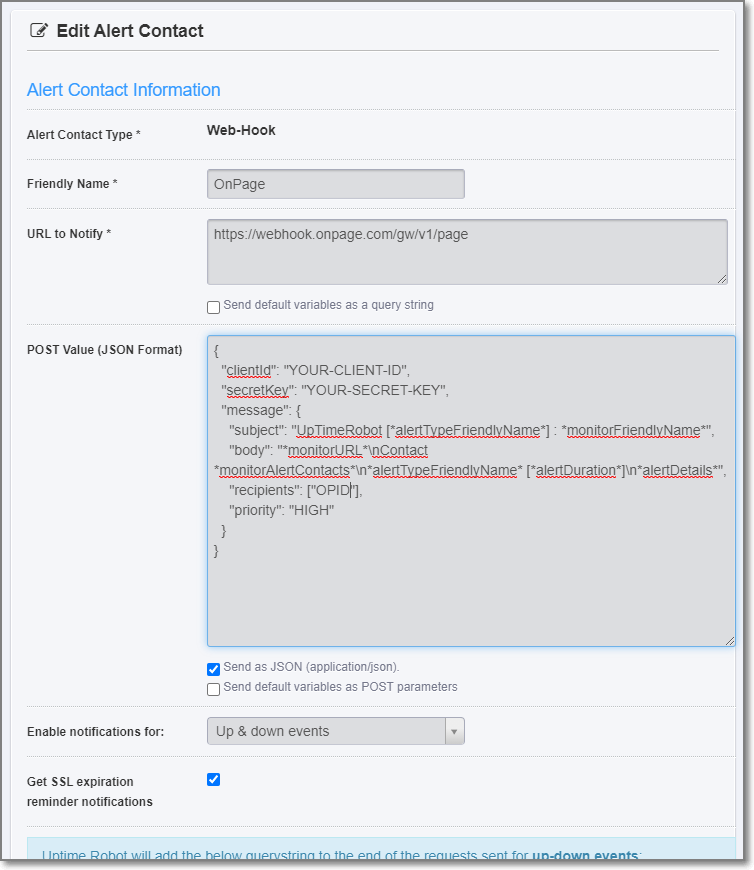
URL – enter https://webhook.onpage.com/gw/v1/page
POST Value (JSON Format)
{
    "clientId": "YOUR-CLIENT-ID",
    "secretKey": "YOUR-SECRET-KEY",
    "message": {
        "subject": "UpTimeRobot [*alertTypeFriendlyName*] : *monitorFriendlyName*",
        "body": "*monitorURL*\nContact *monitorAlertContacts*\n*alertTypeFriendlyName* [*alertDuration*]\n*alertDetails*",
        "recipients": ["OPID"],
        "priority": "HIGH"
    }
}
Replace YOUR-CLIENT-ID and YOUR-SECRET-KEY with your values from registered OnPage web-hook.
Save UpTimeRobot Alert Contact
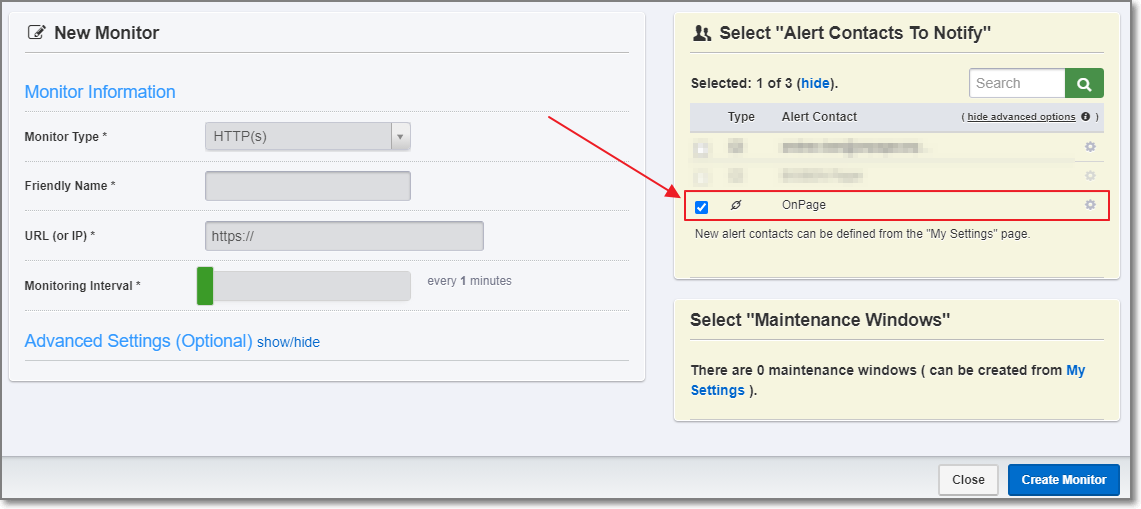
Setting Up the UpTimeRobot Monitor
Create new UpTimeRobot Monitor or edit configuration of the existing one.
In Select “Alert Contact to Notify” section mark created Alert Contact.