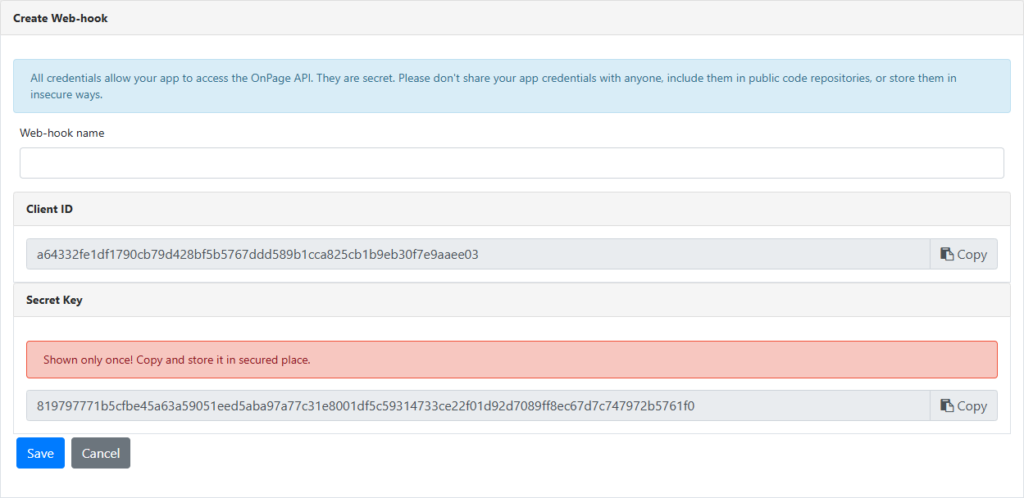
This integration uses OnPage’s Incoming Webhooks. This is a common integration path with OnPage and many other services will support this method as well. To get started, you have to access OnPage’s Webhook Console and register a Client ID and Secret Key. These are then used to authenticate the requests being sent to OnPage. Please keep these values secure as if they were a password. Although they do not allow Read access to OnPage, anyone with these keys can create Pages within your environment.
Navigate to https://integrations.onpage.com/#/integration/web-hook and login with your nps.onpage.com credentials.
Here you will see all of your currently configured Webhooks and the ability to suspend or remove them.
Click on the Create Button

Give a Webhook name (i.e., New Relic ONE integration)
Copy the Secret Key and Client ID and store it in a secure place. The Secret Key is only shown once.
On your SolarWinds server
Log in to SolarWinds with your admin credentials
Click on Settings, then All Settings
Under Alerts and Reports, click on Manage Alerts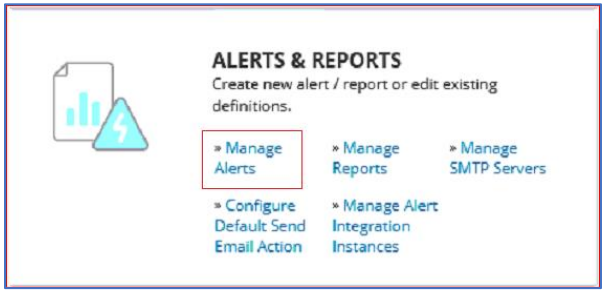
Under ALERT MANAGER click on ADD NEW ALERT
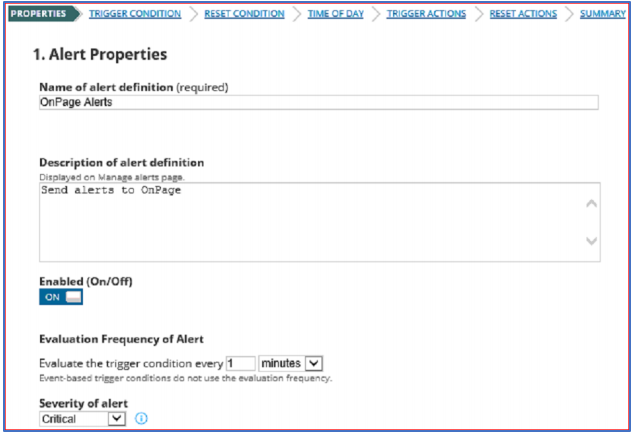
Under Alert Properties
- Name of the alert
- Description of the alert
- Make sure Enabled is ON
- Select the frequency of the alert
- Select the severity
Click Next
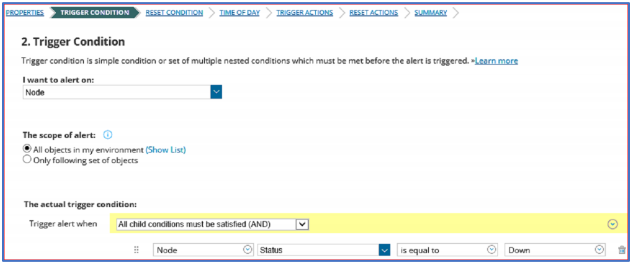
Create a Trigger Condition under Trigger Condition
- Select the object you want to alert from the drop-down menu
- Select the scope of the alert
- Create a trigger condition to alert when:
Click Next
Under Reset Condition, you can choose to remove the alert from active when it is met. It is suggested that you select the recommended option.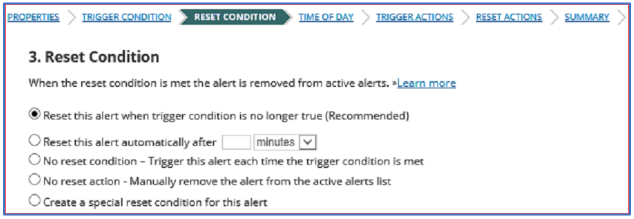
Under Time of Day, you have the option to specify the time of day when this alert should be active.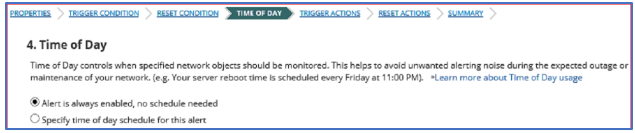
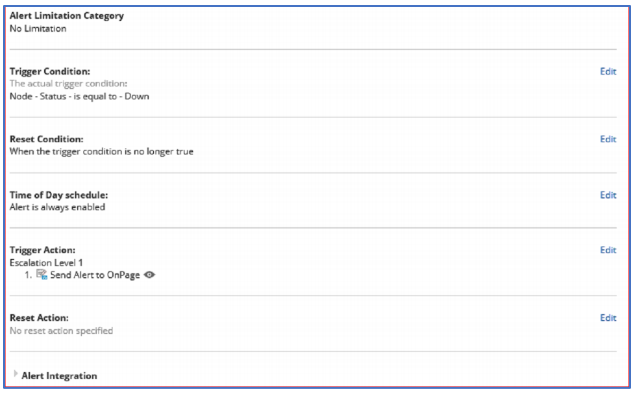
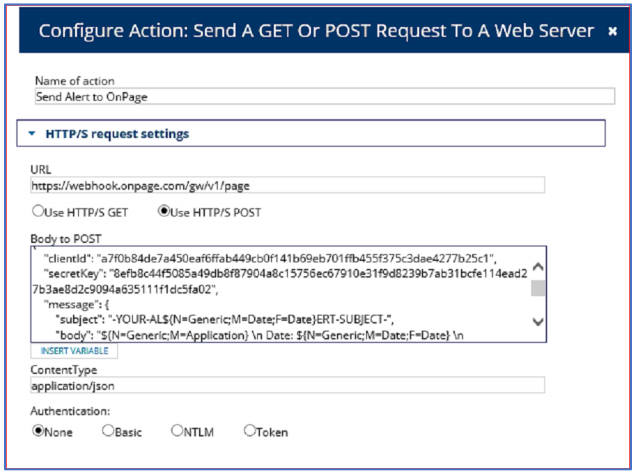
Under Trigger Actions
- Click on Add Actions
- Scroll down and select Send a GET or POST Request to a Web Server

- Click CONFIGURE ACTION
- Name the Action (i.e., Trigger OnPage Alerts)
- URL: https://webhook.onpage.com/gw/v1/page
- Select Use HTTP/S POST
- Go back to the OnPage Integrations page, and copy and paste the script in green in the Body to Post
{
    "clientId": "-YOUR-CLIENT-ID-",
    "secretKey": "-YOUR-SECRET-KEY-",
    "message": {
        "subject": "-YOUR-ALERT-SUBJECT-",
        "body": "*-YOUR-ALERT-MESSAGE-",
        "recipients": ["OPID1", "OPID2", ...],
        "priority": "HIGH|LOW"
    }
}- Edit the script by inserting the Client ID, Secret Key
- Put the cursor on the subject and body and click on INSERT VARIABLE and select what you would like to see as the subject and body of the message in the OnPage app. You can also manually enter the text.
- Enter OnPage recipients OPIDs or Group IDs
- Enter Priority of message. Either HIGH or LOW
- Content Type: application/json
- Authentication: None
- Click Add Action
Reset Action: You can choose to add a reset action to be executed when the reset condition is met.
Click Next
Review the alert summary and click Submit