Login to Microsoft Azure AD
Login to Microsoft Azure Active Directory admin panel
Choose Enterprise Applications on left side menu
Click on New Application button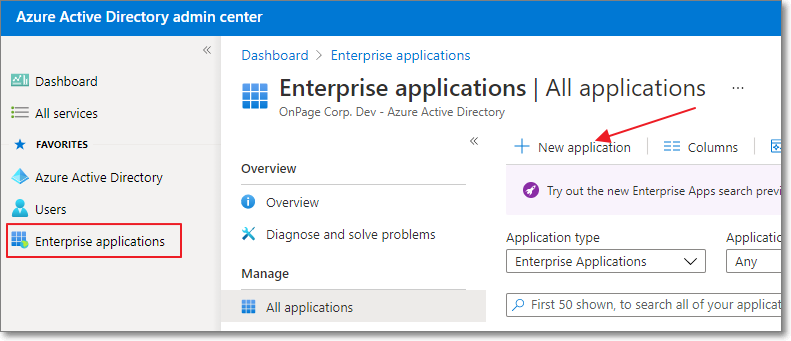
Create Enterprise Application
In Browse Azure AD Gallery click on Create Your Own Application button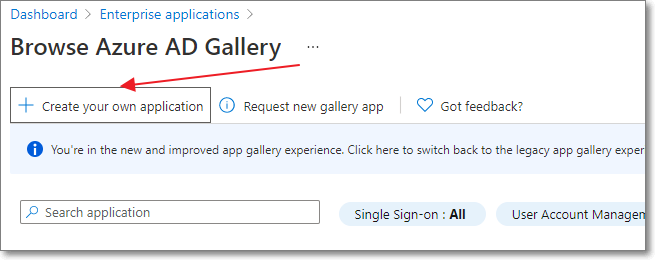
Enter OnPage Account SCIM as name of the aaplication
Choose Integrate any other application you don’t find in the gallery (Non-gallery)
Click Create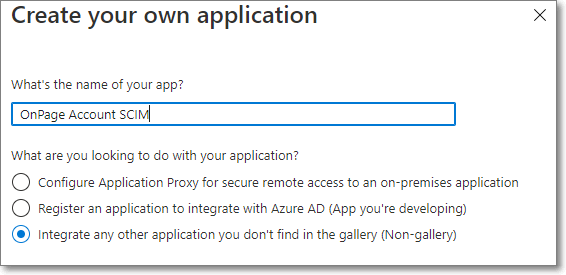
Create Provisioning
On the left side menu, under Manage, click on Provisioning.
Click Get started button.
Choose Automatic as Provisioning Mode.
In Admin Credentials section, enter the values for Tenant URL and Secret Token found on this page under Parameters.
Click Test Connection to check entered values.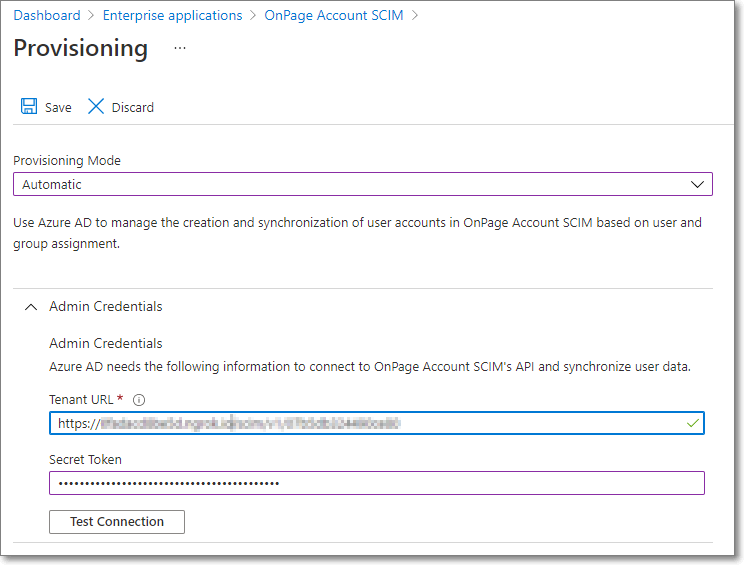
Click Save button
Provisioning Mappings
Open the Mappings section.
Click Provision Azure Active Directory Groups and disable it.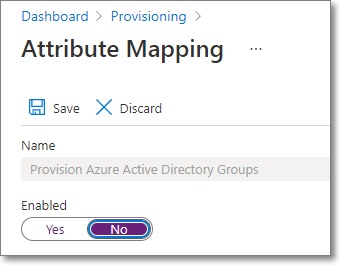
Click Provision Azure Active Directory Users and enabled it.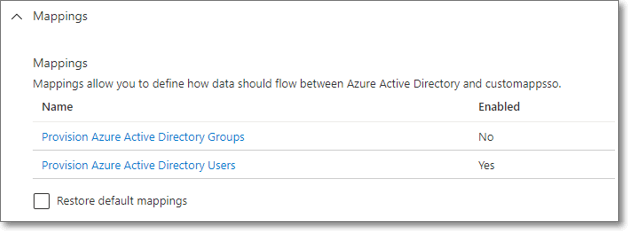
Check Create, Update and Delete in Target Object Actions.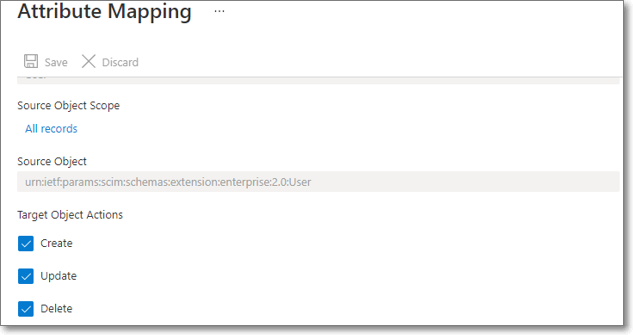
Edit Attribute Mapping as shown in image below.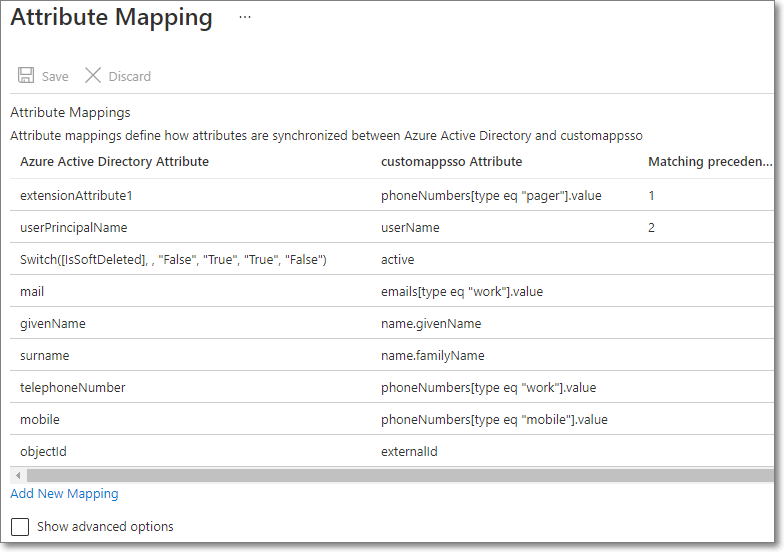
Click Save.
Open Settings section.
Set Scope to Sync only assigned users and groups. You may also choose to add an email address in the Notification Email field to receive an email in the case of an error.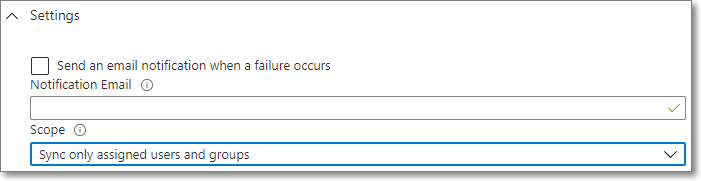
Set Provisioning Status to On.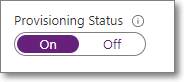
Click Save.
Assign Users to be provisioned
Click on Enterprise Application.
Click on the OnPage application you just created.
Open Users and groups sub-menu.
Click on Add users/group button.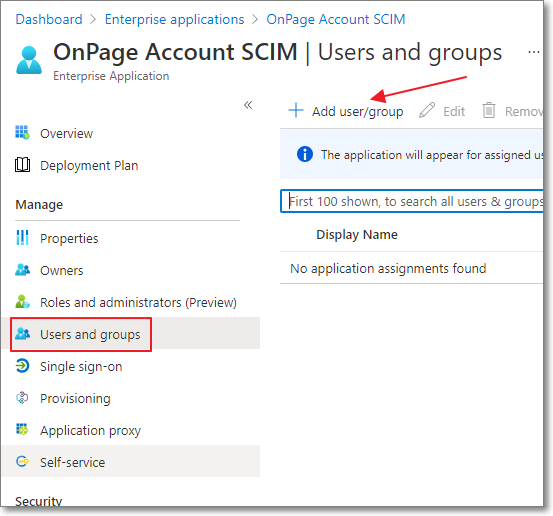
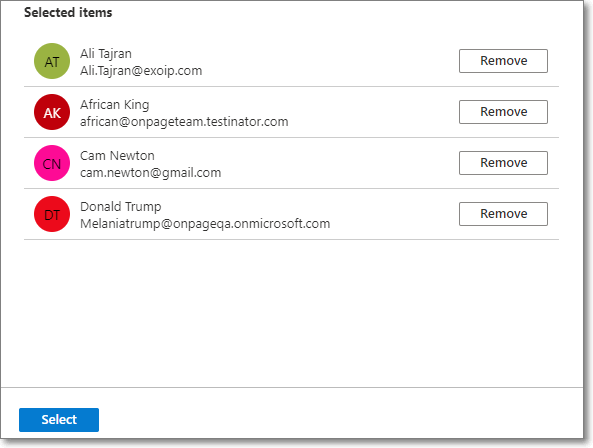
Under Users, click on None Selected.
Select the users you wish to provision to OnPage and click Select.